

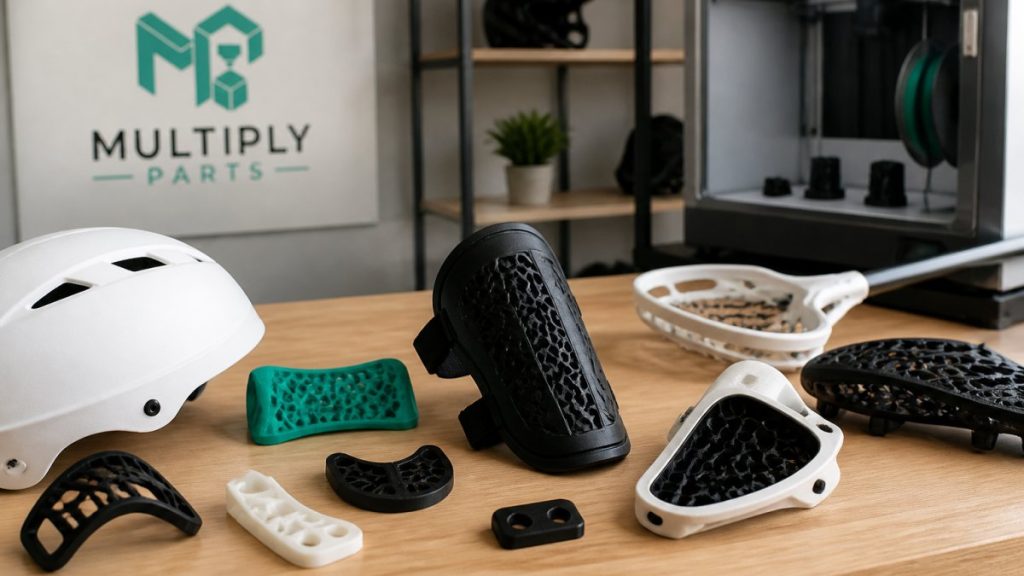
How Do You Design 3D Printed Parts for High-Impact Sports?
Last Updated: October 25, 2026
Quick Summary
To design 3d printed parts for high-impact sports, start with the load case (impact direction, energy, frequency, and failure cost) before opening CAD, then round inside corners and fillets around holes to reduce stress concentrations. Orient layers so they run with the load rather than across it, since printed parts are weakest between layers, and select impact-resistant materials like nylon or TPU matched to the part’s temperature range and failure mode.
- Thick walls with modest infill usually beat thin walls packed with dense infill for impact strength.
- Print orientation is the biggest lever most designers ignore because parts are weakest between layers.
- Plain nylon is the safe default for functional parts that take repeated load.
- Nylon’s glass transition is around 50°C, so it stays tough in cold weather.
- Test to failure on three samples and compare results across print orientations.
Table of Contents
- Start With the Load Case, Not the Model
- 3D Printing Design Guidelines for Strength
- 3D Print Orientation for Strength: Layer Direction Decides Failure
- Choosing Impact-Resistant 3D Printing Materials
- Designing Functional Parts: Rods, Bolts, Gears, and Mounts
- 3D-Printed Part Impact Testing and Validation
- Safety Standards and Certification for Sports Components
- Upload Your CAD Files and Get an Instant Quote
- Frequently Asked Questions
Start With the Load Case, Not the Model
Most designers open CAD and start drawing. That’s the wrong first move for 3d printed parts used in high-impact sports. Start with the load case: what hits the part, how hard, how often, and from which direction.
So before you model anything, define four things:
- Direction: Where does the impact come from?
- Energy: A light tap or a full-speed crash?
- Frequency: One big hit or thousands of small ones?
Write these down. They guide every choice that follows: a part built for repeated low-energy flex needs different geometry than one built for a single high-energy blow.
3D Printing Design Guidelines for Strength
Design guidelines for strength keep a printed part from cracking where it matters. They cover wall thickness, infill, corner geometry, and bed orientation. Follow them and your part survives real use; ignore them and it fails at the worst moment.
These 3D printing design guidelines for strength matter more for sports gear than for display models. Sports parts take abuse.
Wall Thickness, Infill, and Where Material Actually Goes
Wall thickness does more for impact strength than infill percentage. A part with thick walls and modest infill usually beats a thin-walled part packed with dense infill.
A common mistake is cranking infill to maximum and leaving walls thin. That adds weight without adding toughness where it counts.
- Walls: Use multiple perimeters, not one.
- Infill: Moderate density with a strong pattern beats solid fill.
- Material placement: Put mass where the load hits, not in dead zones.
For a deeper framework on picking materials for strength, see our guide on how to choose 3D printing materials for strength.
Reducing Stress Concentrations at Corners and Holes
Sharp inside corners are where parts break: stress piles up and starts a crack. Round those corners and the load spreads out.
The same goes for holes. A bolt hole with sharp edges becomes a fracture point. Add fillets around holes and corners to soften the transition.
- Round every inside corner
- Add fillets where a hole meets a flat surface
- Avoid sudden changes in cross-section
These small changes cost nothing in CAD and add real life to the part.
3D Print Orientation for Strength: Layer Direction Decides Failure
Print orientation for strength is the single biggest lever most designers ignore. Printed parts are weakest between layers.
Think of a printed part like stacked sheets of paper: pull along the sheets and they hold, pull them apart and they peel.
Layer adhesion decides whether a part survives.
Test your orientation before a full run. Print one sample, load it the way it will be used, and watch where it fails.
Choosing Impact-Resistant 3D Printing Materials
Impact-resistant 3D printing materials absorb energy instead of shattering. For high-impact sports components, material selection means matching the polymer and printing process to the specific impact load, temperature range, and failure mode of the part.
Material selection drives performance as much as geometry. Get it wrong and no amount of clever design saves the part.
Nylon, TPU, and Reinforced Filaments Compared
Each material family suits different jobs. Here is how they stack up for impact work:
| Material | Best For | Impact Behavior | Watch Out For |
|---|---|---|---|
| Nylon | Gears, mounts, load-bearing parts | Tough, resists fatigue | Absorbs moisture before printing |
| TPU | Pads, grips, flex zones | Bounces back, absorbs hits | Too soft for rigid frames |
| Carbon-reinforced | Stiff structural parts | Strong but less flex | Can crack under sharp impact |
| Glass-reinforced | Rigid brackets, plates | Stiff and stable | Brittle compared to plain nylon |
Plain nylon is the safe default for functional parts that take repeated load. For specifics on TPU material properties and availability for impact-resistant parts, see our TPU page. TPU wins where comfort and shock absorption matter. Reinforced filaments add stiffness, but they trade away some toughness. For a closer look at carbon fiber options, read our breakdown of carbon fiber reinforced 3D printing.
Layer Adhesion and Failure Behavior
The weakest point in any printed part is the bond between layers. Impact loads that pull layers apart (mode I fracture) cause delamination, while shear loads (mode II) cause sliding between layers.
Failure behavior matters too. Brittle materials like glass-reinforced filaments fail suddenly with little deformation, dangerous in protective equipment. Tough materials like nylon yield and deform before breaking, absorbing more energy.
Temperature Sensitivity and Environmental Factors
Sports equipment sees temperature swings, a ski boot buckle in sub-zero conditions, a bike pedal in summer heat. Most common 3D printing polymers lose impact strength as temperature drops and become brittle below their glass transition temperature.
Moisture absorption is another factor. Nylon absorbs moisture from the air, which acts as a plasticizer and improves impact toughness, but it also causes dimensional changes and steam bubbles during printing if the filament is not dried.
Process Selection: FDM vs. SLS vs. MJF
Material choice is only half the equation; the printing process determines layer adhesion, porosity, and surface finish. Fused deposition modeling (FDM) creates anisotropic parts, strong in the XY plane, weak in Z. Selective laser sintering (SLS) and multi jet fusion (MJF) produce more isotropic parts because they fuse powder in all directions, but they offer a narrower material range and cost more per part.
When comparing materials, request test bars printed in the same orientation and process you plan to use for the final part. A material’s datasheet values often come from injection-molded specimens and do not reflect printed performance.
For a deeper framework on picking materials for strength, see our guide on how to choose 3D printing materials for strength.
Designing Functional Parts: Rods, Bolts, Gears, and Mounts
Functional parts fail for predictable reasons. Rods snap at thin points. Bolts strip or shear. Gears lose teeth. Mounts crack at the screw holes. Design each one around its failure mode and you get a part that lasts.
- Rods: Thicken the middle, taper the ends, avoid sharp steps
- Bolts: Orient layers along the shaft, not across it
- Gears: Add material at the tooth root, the usual break point
A common mistake is treating a printed bolt like a metal one. Printed threads are weaker, so design for a metal fastener where you can, and use the print for the housing around it.
3D-Printed Part Impact Testing and Validation
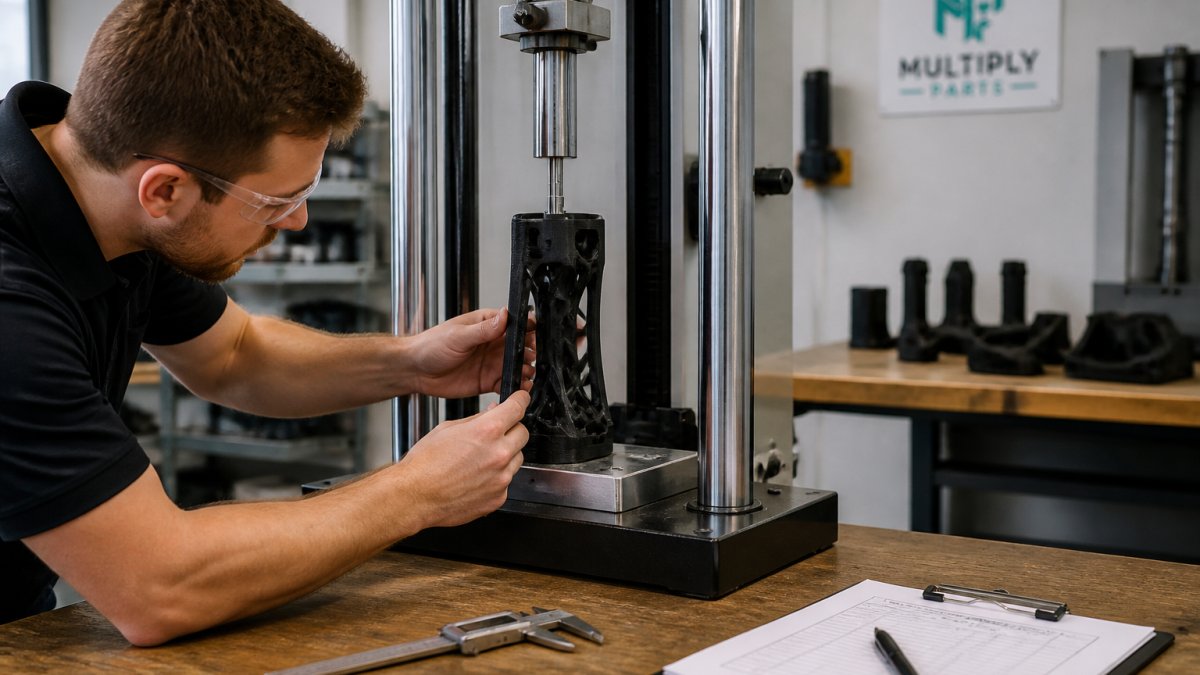
Testing and validation turn a guess into a proven part.
Start simple. Drop the part from a set height. Strike it with a known weight. Flex it repeatedly. Log what happens each time.
Repeatable Impact Testing Protocols
A single drop test tells you little. You need a repeatable protocol that controls drop height, impact surface, part orientation, and temperature. For a shin guard insert, drop a 5 kg weight from 1 meter onto the part mounted in a fixture that simulates the leg, repeat five times on fresh samples, and record whether it cracks, delaminates, or permanently deforms.
Use the same fixture and procedure for every iteration so you can compare results. If you change the geometry, material, or print orientation, test again from scratch.
Fatigue and Environmental Testing
Impact is often repeated, not single, a helmet insert may take hundreds of low-energy hits over a season. Fatigue testing loads the part cyclically at a fraction of its ultimate strength and counts cycles to failure; a common pattern is 10,000 cycles at 50% of the expected peak load, checking for stiffness loss or crack initiation. Test at the temperature extremes the part will see (e.g., -20°C for winter sports, 40°C for summer) and after high-humidity conditioning if the material is moisture-sensitive.
Failure Analysis and Design Iteration
When a part fails, inspect the fracture surface. A clean break between layers means poor layer adhesion, change orientation or raise printing temperature. A crack starting at a sharp corner points to a stress concentration, add a fillet. Permanent deformation without cracking suggests the material is too soft, switch to a stiffer grade or add reinforcement. Document each failure mode and the design change in response; this log becomes your validation record.
When a Prototype Is Not Safe for Athletic Use
A prototype that passes a bench test is not automatically safe for athletes. Protective equipment must meet sport-specific standards, and a custom printed part that has not been certified should never replace certified gear in competition or high-risk training.
Never allow an athlete to use a 3D-printed protective component in contact sports without independent certification. A part that survives a drop test in the workshop may fail catastrophically under game-speed impact.
Validation steps that catch real problems:
- Test to failure, then note where it broke
- Repeat the test on three samples, not one
- Compare results across print orientations
If a part cracks at a corner, round it. If it splits between layers, change orientation. For guidance on the wider safety picture, the Canadian Standards Association publishes standards for protective equipment and sports gear worth reviewing.
Safety Standards and Certification for Sports Components
Safety standards exist because sports parts protect people. A failed shin guard or helmet insert isn’t a cosmetic problem; it’s an injury risk.
This is where hobby printing and production printing split. A prototype can be rough. A part sold to athletes cannot.
- Identify the standard that covers your product type
- Test against the loads that standard specifies
- Document every result
For protective equipment, Standards Council of Canada lists accredited bodies that test and certify products. Work with one before you scale.
Upload Your CAD Files and Get an Instant Quote
You’ve got the load case, the geometry, the material, and a test plan. The last step is turning your design into a real part.
MultiplyParts offers instant pricing and no minimum order quantities, so you can order one sample or scale to full production. Explore the full range of materials we run.
Impact-resistant parts reward careful design. Get the load case right, orient your layers well, pick the right material, and test before you scale.
Frequently Asked Questions
How do you design a 3D printed part to withstand impact?
Start from the load case: identify where and how hard the part gets hit, then design around that direction. Round internal corners to spread stress, keep walls thick enough to absorb energy, and orient the print so layers run across the impact rather than along it. Choose a material with high toughness, such as nylon, rather than a stiff but brittle one. Finally, test a prototype under realistic impact before committing to a production run.
Which materials work best for impact-resistant 3D printing materials in sports gear?
Nylon and nylon blends with carbon or glass fiber offer a strong balance of toughness and stiffness for brackets, mounts, and guards. TPU suits padding, grips, and parts that need to flex and recover. Avoid standard PLA for anything load-bearing, since it cracks rather than absorbs energy. The right pick depends on the part: a helmet liner and a gear mount have very different requirements, so match the material to the failure mode you can accept.
How should print orientation affect 3D print orientation for strength?
Printed parts are weakest between layers, so layer adhesion is the limiting factor under impact. Orient the part so tensile and impact loads run along the layers, not across them. For a bracket that takes a sideways hit, that often means printing it on its side rather than flat. Check the orientation in your slicer before quoting, and note that a reorientation can change support needs and cost.
What wall thickness and infill should an impact-resistant 3D print use?
For load-bearing sports parts, use at least three to four perimeters and 40 to 60 percent infill, with gyroid or cubic patterns that spread force in multiple directions. Thin walls and low infill save weight but buckle under impact. Where weight matters, add material at the load path and remove it elsewhere rather than lowering infill across the whole part. Wall thickness and infill should follow the stress map, not a single global setting.
High-impact sports parts leave no room for guesswork. At MultiplyParts, we help you move from a tested design to a production-ready part with instant pricing, no minimum order quantities, and a material range built for tough jobs. Get started with MultiplyParts and turn your impact-tested design into a finished component.

